Steps To Install .NET Add-in
Steps to install .Net Add-ins using .msi file
- Go to https://marketplace.daloopa.com/ and login.
- Click on Plugin button.

- Now click on Excel Plugin MSI button and select version to download .msi file
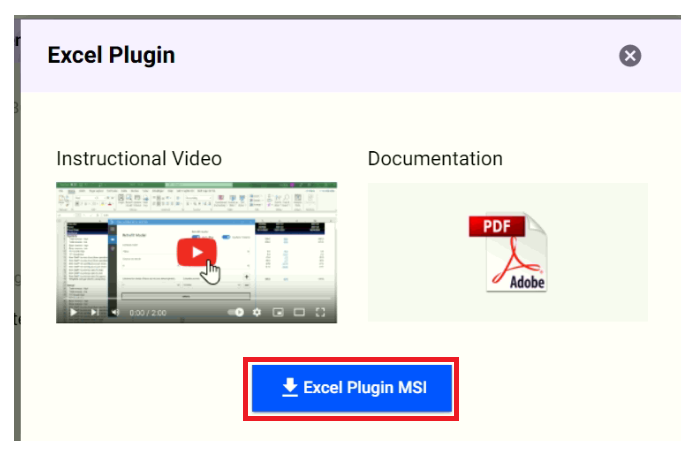
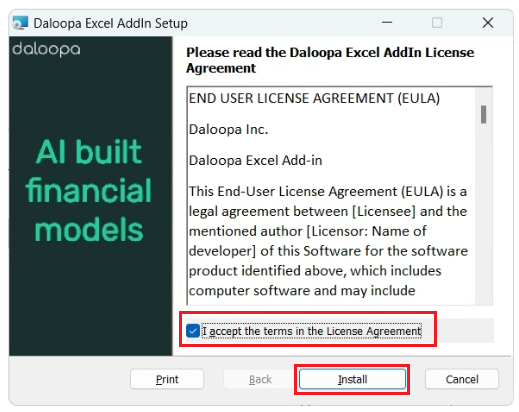
- Double click on downloaded file and check this checkbox and click Install.
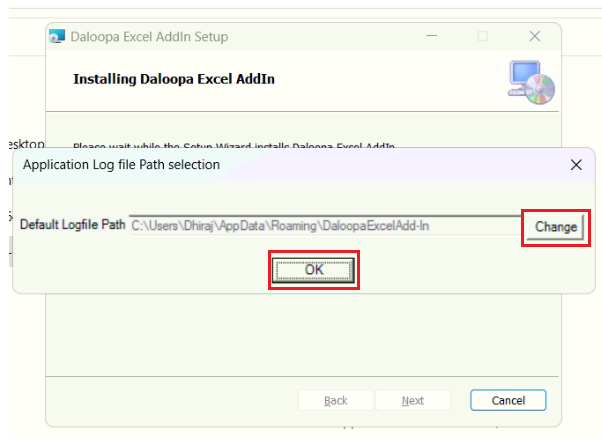
- Select location where you want to save log file by clicking on change button and click OK.
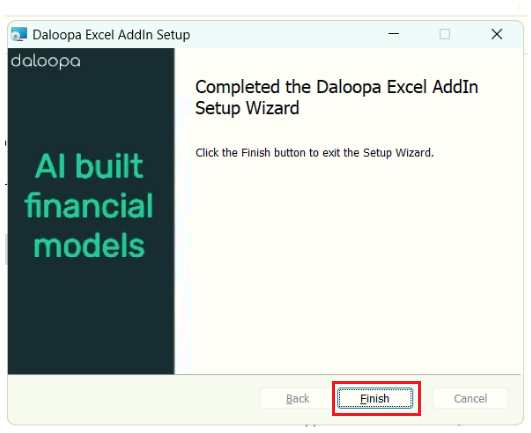
- Click on Finish button, plug-in installed successfully.
Steps to install .Net Add-ins using XLL file
- In Excel, go to "File" > "Options" > "Add-Ins" and check Manage drop down and select "Excel Add-ins" and click on "Go" button.
- Click on "Browse" button from popup window.
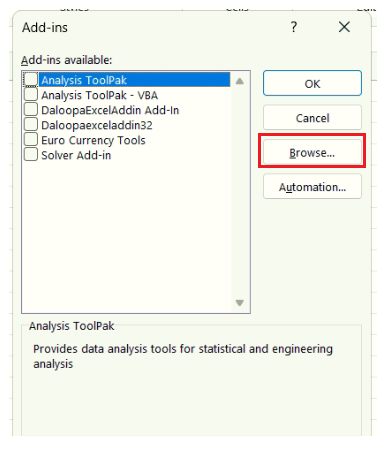
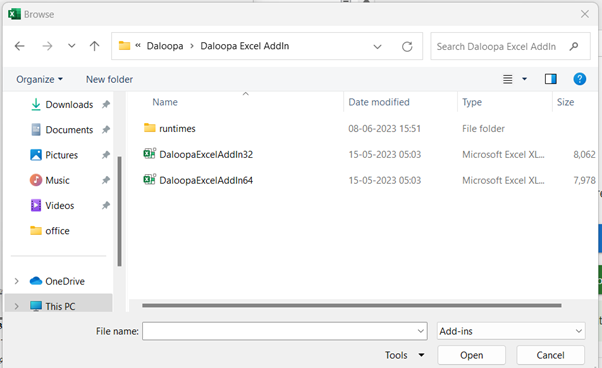
- Select file from window (if you have 32 bit excel version then select DaloopaExcelAddIn32.xll file or if you have 64 bit excel version then select DaloopaExcelAddIn64.xll) and click on Open button.
- Select DaloopaExcelAddin if not selected and click on OK button.
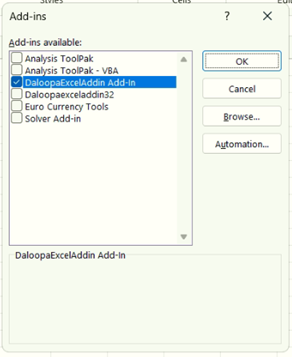
- Add-in installed successfully.

Troubleshooting Steps to Install .NET Add-in
If add-in is already installed using MSI but its status is disable.
Step 1: In Excel, go to "File" > "Options" > "Add-Ins" > "Disabled Application Add-ins" and check plug-in is there.
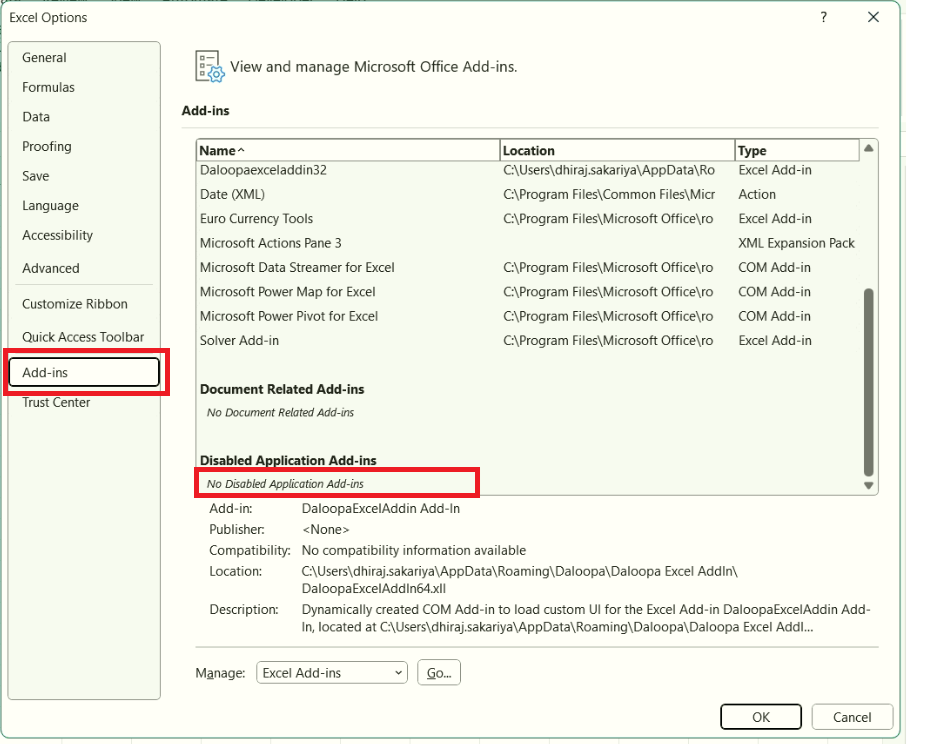
Step 2: Select Daloopa Excel Add-in from Disabled Applications Add-ins list and check Manage dropdown and select “Disabled Items” from dropdown and click "Go".
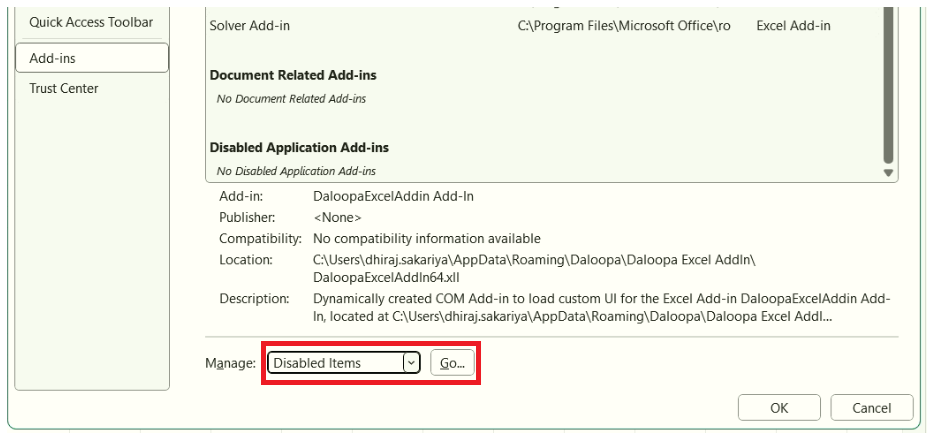
Step 3: Select item from disabled items list and click on "Enable" button.
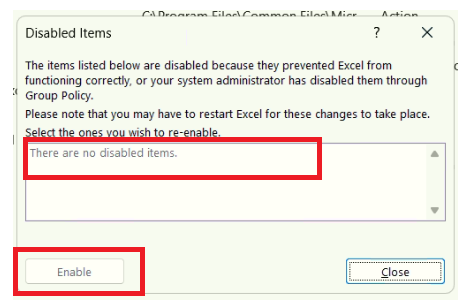
Step 4: Restart excel and check that Daloopa addin will be shown Ribbon control.

Updated 3 months ago
