Lightning Add-in Installation Instructions
Step 1: Determine if user has access to Office AppSource (Microsoft’s marketplace for add-ins, similar to Apple’s App Store). If yes, install the add-in directly from AppSource. If not, move to Step 2.

Open Excel, go to “Insert” then “Get Add-in“.
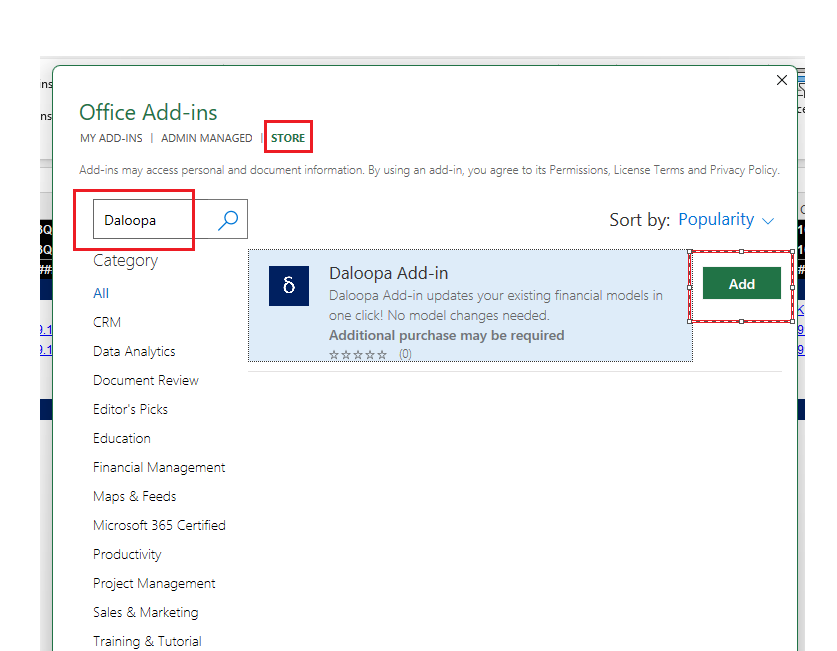
In the popup, click on “STORE“ then search for “daloopa“ and click on “Add“

You can find the add-in in the “Home“ tab
Step 2: Find MS Office 365 Admin who will need to perform these steps:
For MS Office Admin to deploy the add-in to your organization:
-
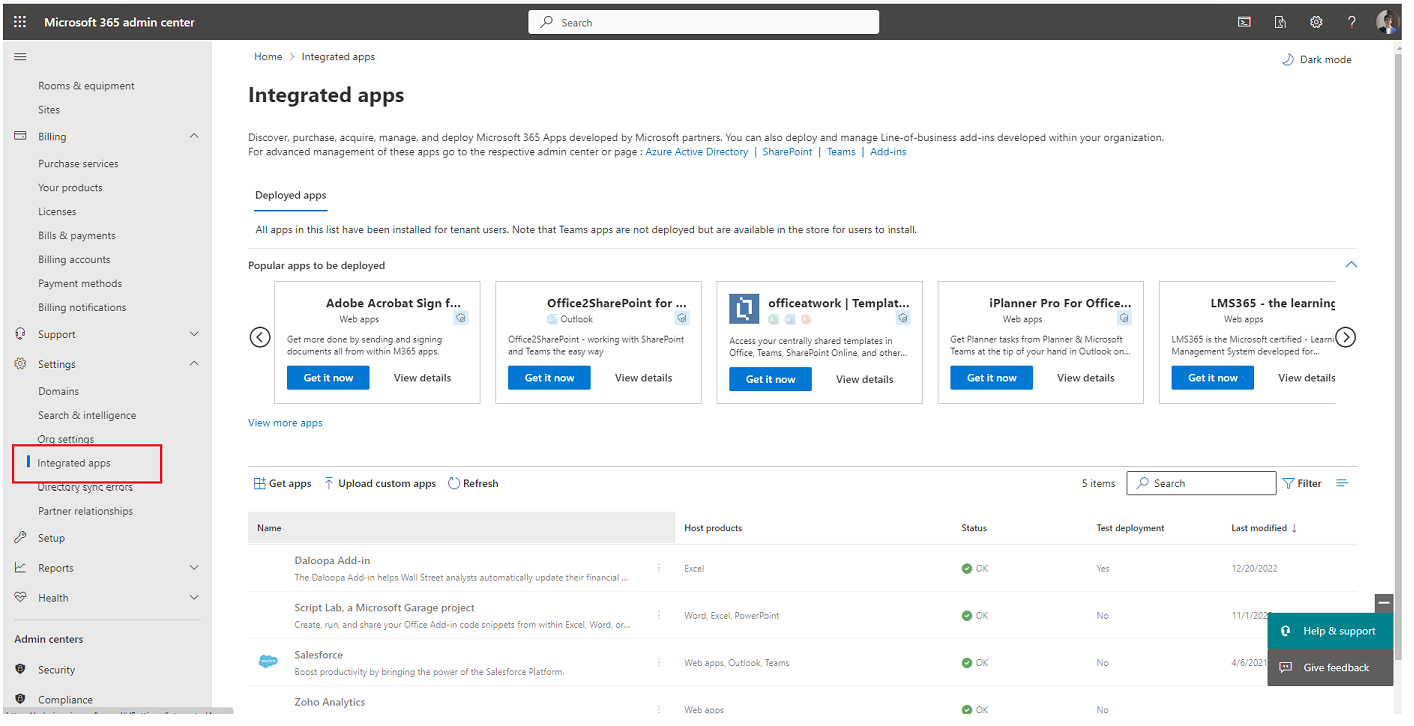
Go to https://admin.microsoft.com/.
-
Click “Integrated Apps“ on the left panel.
-
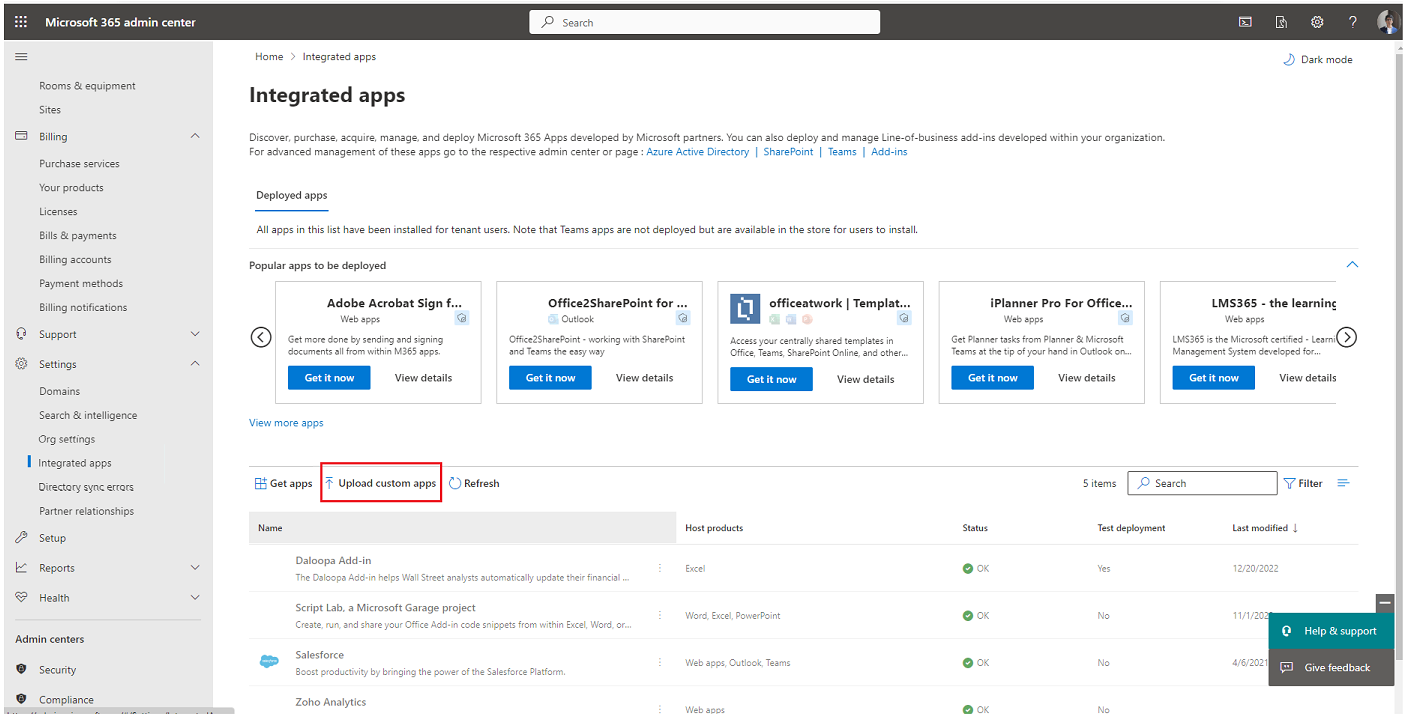
Then click "Upload Custom apps".
-
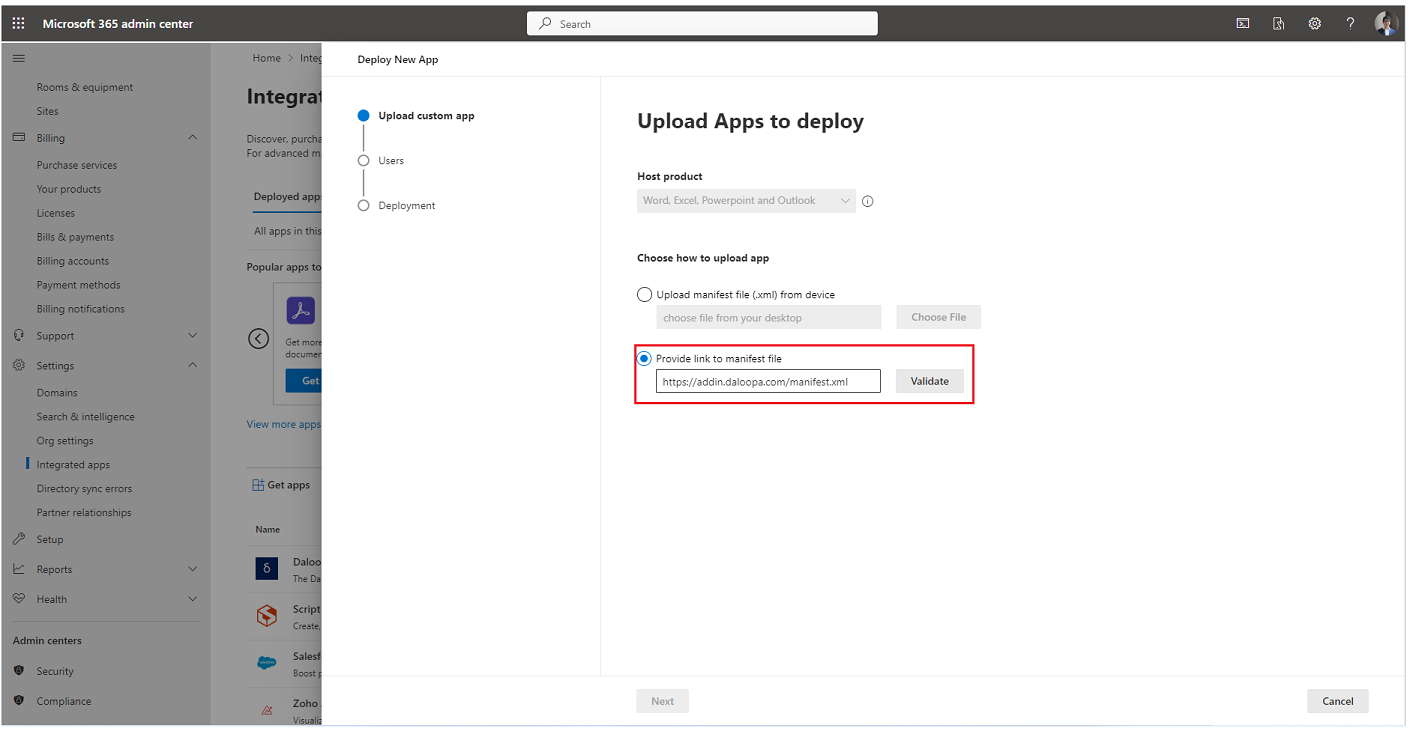
In the popup that follows, select "Provide link to manifest file."
-
Put
https://addin.daloopa.com/manifest.xmlas the manifest link and click "Validate". Validation should pass. -
Then click "Next" and select the users that you want to deploy the add-in to.
-
Finish the deployment process by following the instructions on the popup.
For end users to install the add-in in their excel applications:
- Open excel and go to "Insert".
- Click "Get Add-ins".
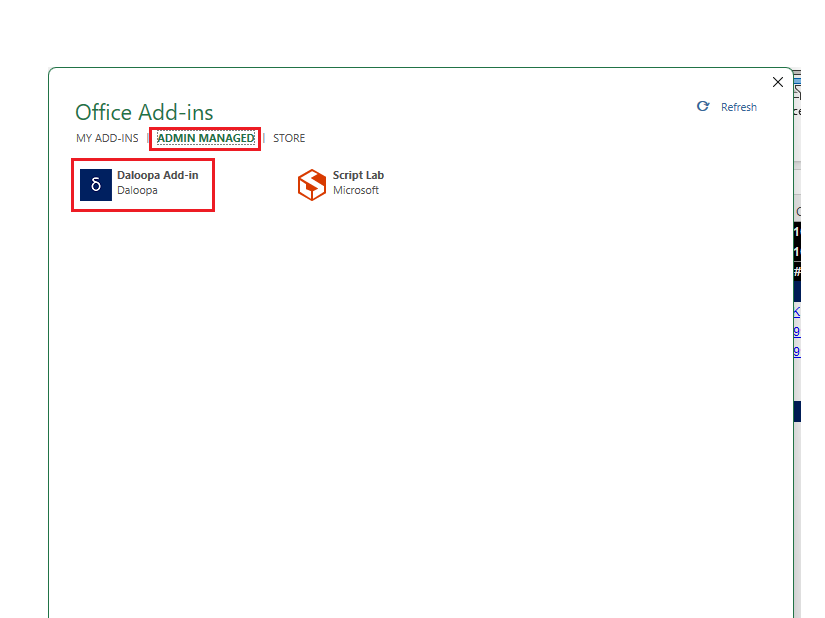
- Click "ADMIN MANAGED".
- If you can't find Daloopa Add-in on this tab, it is likely that your MS 365 admin has not added you to the user groups. See step 6 under "For IT Admin to deploy the add-in to your organization".
- Select the Daloopa Add-in and then click "Add".
Updated 4 months ago

